Install n8n on a VPS With Docker: Why Port 5678 Must Stay on Localhost
AI Coding 19 min read By Sanjeev Pratap Singh
In this articleTable of contents14
Last updated: 10 October 2026
n8n lets you build automations and AI agents by connecting apps like Gmail, Google Sheets, WhatsApp, Telegram and OpenAI on a visual canvas. Running it on your own server removes execution limits and keeps your data under your control. This guide shows you how to install n8n on VPS hosting running Ubuntu 24.04 LTS, using the Docker Compose setup from the official n8n documentation, with your own domain and a free Let's Encrypt HTTPS certificate. You will also learn the key environment variables, how to update safely, how to back up, and the minimum VPS specs you actually need.
Quick answer: To install n8n on a VPS, point a subdomain (like n8n.yourdomain.in) to the server's IP, install Docker Engine and the Compose plugin on Ubuntu 24.04, create a
.envfile and the officialcompose.yaml(n8n plus a Traefik reverse proxy), then rundocker compose up -d. Traefik fetches a free HTTPS certificate automatically.
What is n8n?
n8n (pronounced "n-eight-n") is a workflow automation tool. You connect "nodes" on a canvas: a trigger (a new form entry, a webhook, a schedule) followed by actions (send a WhatsApp message, update a sheet, call an AI model). It is often compared with Zapier and Make, but with two big differences:
- You can self-host it. The code is on GitHub (opens in new tab) under a fair-code licence (the Sustainable Use License), which allows free self-hosting for your own or your company's internal use.
- It handles code and AI well. You can add JavaScript or Python steps, build AI agents, and connect tools through MCP. If MCP is new to you, read our explainer on what an MCP server is.
Indian freelancers and small businesses use it for lead capture to Google Sheets, invoice reminders, WhatsApp or Telegram bots, social media scheduling and AI-powered email replies.
n8n self-hosted vs n8n Cloud
| Point | Self-hosted (Community Edition) | n8n Cloud |
|---|---|---|
| Software cost | Free under the Sustainable Use License | From €20/month (Starter, billed annually) |
| Server cost | Your VPS, roughly ₹500 to ₹1,200/month | Included |
| Executions | No n8n limit (limited by your server) | 2,500/month on Starter, 10,000 on Pro |
| Setup and updates | You do it | Managed by n8n |
| Backups and security | Your responsibility | Managed by n8n |
| Data location | Wherever your VPS is (India possible) | n8n's cloud regions |
| Best for | Developers, heavy users, data control | Non-technical users, teams wanting zero maintenance |
n8n Cloud pricing as listed on n8n.io/pricing (opens in new tab) in October 2026:
| Plan | Price | Executions | Notes |
|---|---|---|---|
| Starter | €20/month, billed annually | 2,500 | 5 concurrent executions, free trial without card |
| Pro | €50/month, billed annually | 10,000 | Up to 50 concurrent executions, workflow history |
| Business | €667/month, billed annually | 40,000 | Self-hosted only; SSO, Git version control, queue mode |
| Enterprise | Contact sales | Custom | Cloud or self-hosted |
Monthly billing costs more; n8n says annual billing saves 17%. A card is needed only for the Business plan's free trial.
Our take: if you are comfortable with a Linux terminal, self-hosting is far cheaper once you run more than a few thousand executions a month. If you have never used SSH and just want automations that work, n8n Cloud avoids maintenance and security worries. The n8n docs themselves recommend Cloud for people without server experience.
Minimum VPS specs for n8n
n8n is not CPU-heavy. Its documentation for embedded deployments gives illustrative sizing of 320 MB to 2 GB of memory and 512 MB to 4 GB of SSD storage for the database, and notes that an idle n8n Cloud instance uses roughly 100 MB of RAM. Memory use grows with the amount of data your workflows process, especially with Code nodes and large files.
| Use case | vCPU | RAM | Storage | Notes |
|---|---|---|---|---|
| Learning, a few simple workflows | 1 | 1 to 2 GB (+2 GB swap) | 20 GB | Works, but add swap |
| Personal / small business automations | 1 to 2 | 4 GB | 40 to 50 GB | Comfortable for most users |
| AI agents, many workflows, large files | 2 to 4 | 8 GB | 100 GB | Consider PostgreSQL |
Examples of suitable plans (as of 10 October 2026, ex-GST):
- Hostinger KVM 1: 1 vCPU, 4 GB RAM, 50 GB NVMe, ₹599/month promo (renews ₹999/month), India location available. See our Hostinger review.
- Contabo Cloud VPS: often more RAM per rupee; Contabo has a data centre in Navi Mumbai (select India in the configurator) plus Asian locations in Singapore and Tokyo, per its locations page (opens in new tab). Check the configurator for any extra monthly charge for the region. See our Contabo VPS review.
- Oracle Cloud Free Tier: free Arm instances if you can get capacity; see our Oracle Cloud free tier guide.
For a full comparison, read our guide to the best VPS hosting in India.
·.
Before you start
You need:
- A VPS running Ubuntu 24.04 LTS with a public IPv4 address and root or sudo access.
- A domain name you control, so you can create a subdomain like
n8n.yourdomain.in. - An SSH client on your computer or phone:
- Windows 10/11: PowerShell has
sshbuilt in. PuTTY also works. - Mac: Terminal app,
sshis built in. - Android: install Termux from F-Droid, then run
pkg install openssh.
- Windows 10/11: PowerShell has
- Ports 80 and 443 open in any cloud firewall (Oracle Cloud security lists, AWS security groups, Hostinger's VPS firewall).
If you have never logged in to a server, start with our guide on how to connect to a VPS using SSH, then do the basics in our Ubuntu VPS initial server setup guide (non-root sudo user, SSH keys, firewall).
Step-by-step: install n8n on VPS with Docker Compose
These steps follow n8n's official Docker Compose server setup (opens in new tab) and Docker's official Ubuntu install guide (opens in new tab), checked on 10 October 2026. The official setup uses Traefik as the reverse proxy, which handles HTTPS certificates from Let's Encrypt automatically.
Step 1: Log in to your VPS
Connect from your computer (replace the IP with yours):
ssh [email protected]
This opens a secure shell on the server. On first connect, type yes to accept the server's fingerprint.
Step 2: Update Ubuntu
sudo apt update && sudo apt upgrade -y
This refreshes the package list and installs security updates. Reboot with sudo reboot if a kernel update was installed, then reconnect.
Step 3: Set up the firewall
sudo ufw allow OpenSSH
sudo ufw allow 80/tcp
sudo ufw allow 443/tcp
sudo ufw enable
These allow SSH, HTTP (needed for the certificate challenge and redirect) and HTTPS, then turn on the firewall. Always allow OpenSSH before enabling UFW, or you can lock yourself out.
Security warning: Docker's documentation notes that ports published by Docker containers bypass UFW rules. That is why the n8n container below publishes port 5678 only on 127.0.0.1, so it is not exposed to the internet directly.
Step 4: Install Docker Engine and the Compose plugin
Add Docker's official GPG key:
sudo apt update
sudo apt install ca-certificates curl
sudo install -m 0755 -d /etc/apt/keyrings
sudo curl -fsSL https://download.docker.com/linux/ubuntu/gpg -o /etc/apt/keyrings/docker.asc
sudo chmod a+r /etc/apt/keyrings/docker.asc
This installs prerequisites and saves Docker's signing key so apt can trust its packages.
Add Docker's repository:
sudo tee /etc/apt/sources.list.d/docker.sources <<EOF
Types: deb
URIs: https://download.docker.com/linux/ubuntu
Suites: $(. /etc/os-release && echo "${UBUNTU_CODENAME:-$VERSION_CODENAME}")
Components: stable
Architectures: $(dpkg --print-architecture)
Signed-By: /etc/apt/keyrings/docker.asc
EOF
sudo apt update
This writes the repository file (on Ubuntu 24.04 the suite resolves to noble) and refreshes the package list.
Install Docker:
sudo apt install docker-ce docker-ce-cli containerd.io docker-buildx-plugin docker-compose-plugin
This installs Docker Engine, the CLI and the Docker Compose plugin.
Verify:
docker --version
docker compose version
sudo docker run hello-world
These print the installed versions and run a test container that prints a "Hello from Docker!" message.
Step 5: Run Docker without sudo (optional)
sudo usermod -aG docker ${USER}
This adds your user to the docker group. Log out and log back in for it to take effect, then check with groups. Note that membership of the docker group is effectively root access, so only add trusted users.
Step 6: Point your subdomain to the VPS
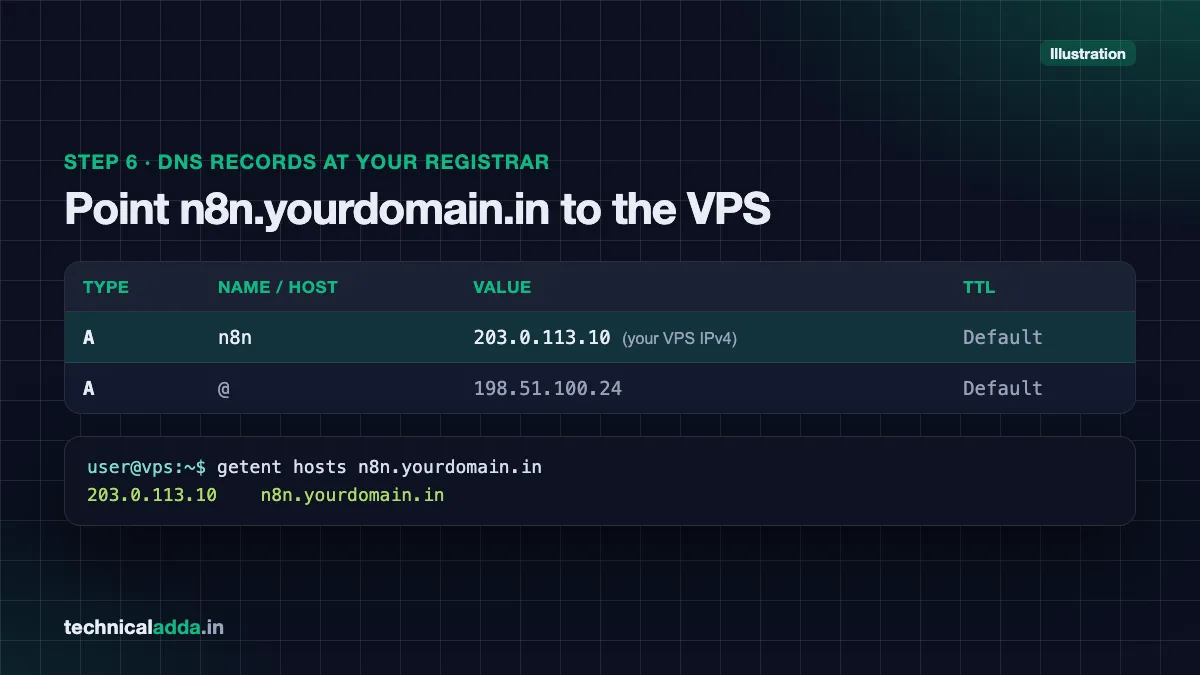
At your domain registrar or DNS provider, create an A record:
- Name/Host:
n8n - Value: your VPS IPv4 address
- TTL: default
Check it from the VPS:
getent hosts n8n.yourdomain.in
This should print your VPS IP. If not, wait for DNS to propagate before continuing, otherwise the HTTPS certificate request will fail. Our domain vs hosting guide explains A records if you are new to DNS.
Step 7: Create the project folder and .env file
mkdir n8n-compose
cd n8n-compose
nano .env
This creates a folder for the setup and opens a new .env file in the nano editor.
Paste this, replacing the domain and email with yours:
#n8n will be served at https://n8n.yourdomain.in
DOMAIN_NAME=yourdomain.in
SUBDOMAIN=n8n

#Timezone for Schedule/Cron nodes
GENERIC_TIMEZONE=Asia/Kolkata

#Email used for Let's Encrypt certificate registration
[email protected]
Save with Ctrl+O, press Enter, and exit with Ctrl+X. Setting Asia/Kolkata makes scheduled workflows run on Indian time.
Step 8: Create the shared files folder
mkdir local-files
This folder is mounted inside n8n at /files, so nodes like Read/Write Files from Disk can save and read files you can also see on the server.
Step 9: Create compose.yaml
nano compose.yaml
This opens the Docker Compose file. Paste the official configuration from the n8n docs:
services:
  traefik:
    image: "traefik"
    restart: always
    command:
      - "--api.insecure=true"
      - "--providers.docker=true"
      - "--providers.docker.exposedbydefault=false"
      - "--entrypoints.web.address=:80"
      - "--entrypoints.web.http.redirections.entryPoint.to=websecure"
      - "--entrypoints.web.http.redirections.entrypoint.scheme=https"
      - "--entrypoints.websecure.address=:443"
      - "--certificatesresolvers.mytlschallenge.acme.tlschallenge=true"
      - "--certificatesresolvers.mytlschallenge.acme.email=${SSL_EMAIL}"
      - "--certificatesresolvers.mytlschallenge.acme.storage=/letsencrypt/acme.json"
    ports:
      - "80:80"
      - "443:443"
    volumes:
      - traefik_data:/letsencrypt
      - /var/run/docker.sock:/var/run/docker.sock:ro

  n8n:
    image: n8nio/n8n
    restart: always
    ports:
      - "127.0.0.1:5678:5678"
    labels:
      - traefik.enable=true
      - traefik.http.routers.n8n.rule=Host(`${SUBDOMAIN}.${DOMAIN_NAME}`)
      - traefik.http.routers.n8n.tls=true
      - traefik.http.routers.n8n.entrypoints=web,websecure
      - traefik.http.routers.n8n.tls.certresolver=mytlschallenge
      - traefik.http.middlewares.n8n.headers.SSLRedirect=true
      - traefik.http.middlewares.n8n.headers.STSSeconds=315360000
      - traefik.http.middlewares.n8n.headers.browserXSSFilter=true
      - traefik.http.middlewares.n8n.headers.contentTypeNosniff=true
      - traefik.http.middlewares.n8n.headers.forceSTSHeader=true
      - traefik.http.middlewares.n8n.headers.SSLHost=${DOMAIN_NAME}
      - traefik.http.middlewares.n8n.headers.STSIncludeSubdomains=true
      - traefik.http.middlewares.n8n.headers.STSPreload=true
      - traefik.http.routers.n8n.middlewares=n8n@docker
    environment:
      - N8N_ENFORCE_SETTINGS_FILE_PERMISSIONS=true
      - N8N_HOST=${SUBDOMAIN}.${DOMAIN_NAME}
      - N8N_PORT=5678
      - N8N_PROTOCOL=https
      - NODE_ENV=production
      - N8N_WEBHOOK_URL=https://${SUBDOMAIN}.${DOMAIN_NAME}/
      - GENERIC_TIMEZONE=${GENERIC_TIMEZONE}
      - TZ=${GENERIC_TIMEZONE}
      - N8N_RESTRICT_FILE_ACCESS_TO=/files
    volumes:
      - n8n_data:/home/node/.n8n
      - ./local-files:/files

volumes:
  n8n_data:
  traefik_data:
What this does, in short:
- traefik listens on ports 80 and 443, redirects HTTP to HTTPS, and gets a Let's Encrypt certificate for your subdomain.
- n8n runs the official
n8nio/n8nimage, reachable only through Traefik, with your hostname, HTTPS webhook URL and timezone set. - n8n_data is a Docker volume that stores n8n's SQLite database and its encryption key.
Version note: the n8n docs say N8N_WEBHOOK_URL works from n8n 2.30.0 onwards; older versions use WEBHOOK_URL. The docs show the current stable release at the top of the page (2.43.8 on 20 October 2026), and the plain n8nio/n8n image pulls the latest stable.
About --api.insecure=true: this enables Traefik's dashboard on its internal port 8080. It is not reachable from outside because port 8080 is not published in this file. Do not add 8080:8080 to the ports list.
Step 10: Start n8n
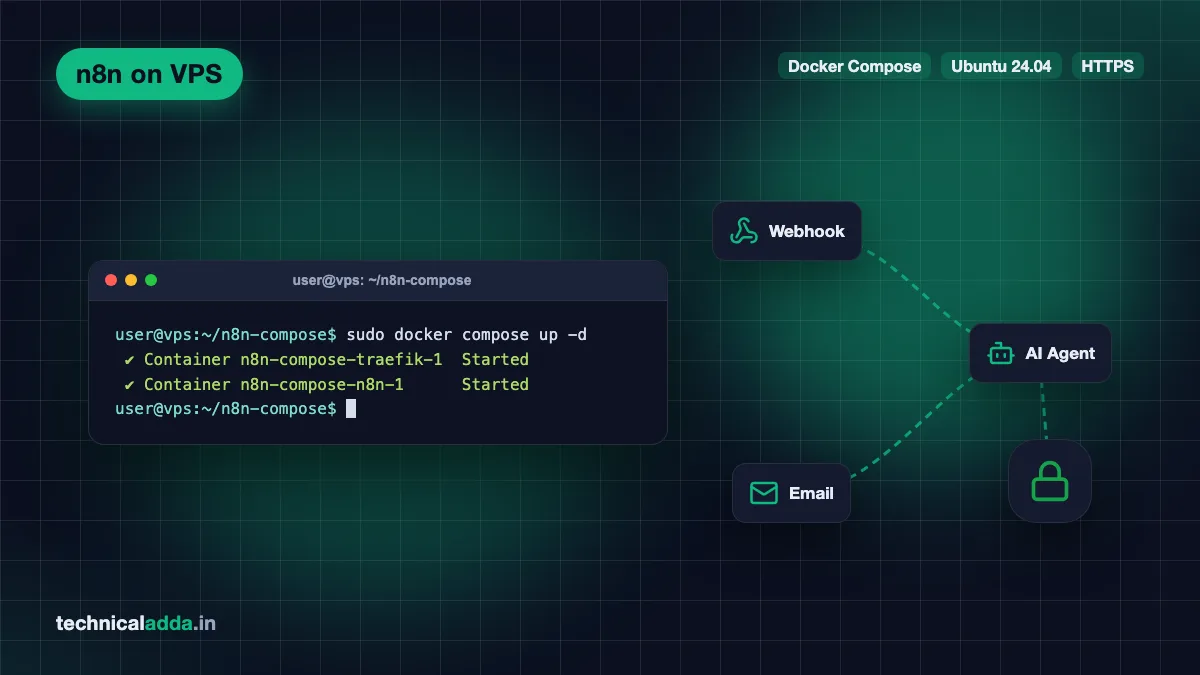
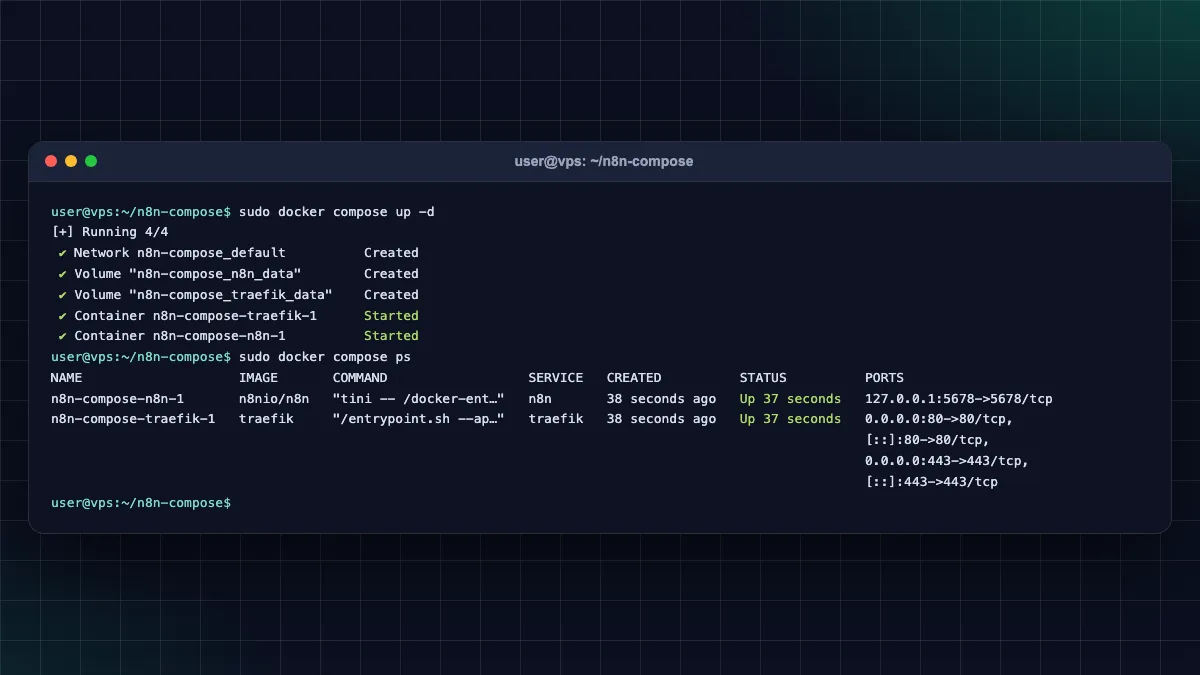
sudo docker compose up -d
This downloads the images and starts both containers in the background. Skip sudo if you completed Step 5.
Check that both are running:
sudo docker compose ps
sudo docker compose logs -f n8n
The first command lists containers and their status; the second streams n8n's logs (press Ctrl+C to stop watching).
Step 11: Open n8n and create the owner account
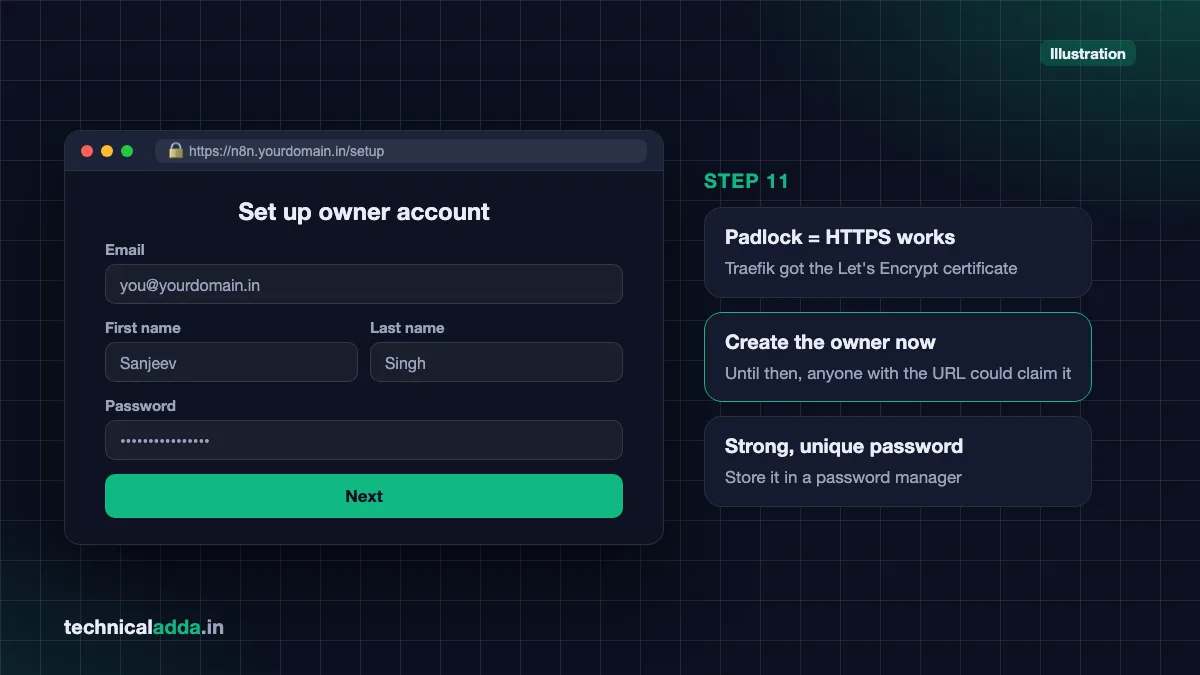
Visit https://n8n.yourdomain.in in your browser. You should see a padlock and the n8n setup screen. Create the owner account with a strong, unique password. Do this immediately: until an owner exists, anyone who finds the URL could claim it.
Alternative: use Caddy as the reverse proxy
If your VPS already runs a web server, or you prefer a simpler proxy, you can use Caddy instead of Traefik. Caddy also gets Let's Encrypt certificates automatically and passes WebSocket connections, which the n8n editor needs.
- Install Caddy using its official Ubuntu instructions (opens in new tab):
sudo apt install -y debian-keyring debian-archive-keyring apt-transport-https curl
curl -1sLf 'https://dl.cloudsmith.io/public/caddy/stable/gpg.key' | sudo gpg --dearmor -o /usr/share/keyrings/caddy-stable-archive-keyring.gpg
curl -1sLf 'https://dl.cloudsmith.io/public/caddy/stable/debian.deb.txt' | sudo tee /etc/apt/sources.list.d/caddy-stable.list
sudo chmod o+r /usr/share/keyrings/caddy-stable-archive-keyring.gpg
sudo chmod o+r /etc/apt/sources.list.d/caddy-stable.list
sudo apt update
sudo apt install caddy
These add Caddy's signed package repository and install Caddy as a system service.
- In
compose.yaml, delete the wholetraefikservice, thelabelsblock of n8n and thetraefik_datavolume. Keep127.0.0.1:5678:5678and add one environment line:
- N8N_PROXY_HOPS=1
This tells n8n it sits behind one reverse proxy, as n8n's reverse-proxy webhook docs recommend.
- Edit
/etc/caddy/Caddyfileso it contains:
n8n.yourdomain.in {
    reverse_proxy localhost:5678
}
This tells Caddy to serve your subdomain over HTTPS and forward requests to n8n.
- Apply the changes:
sudo systemctl reload caddy
sudo docker compose up -d
The first command reloads Caddy's config; the second recreates the n8n container with the new settings.
Using nginx with Certbot also works, but you must add WebSocket headers (Upgrade and Connection) and the X-Forwarded-* headers yourself, so Caddy or the official Traefik setup is easier for beginners.
Important n8n environment variables
| Variable | Example | What it does |
|---|---|---|
N8N_HOST |
n8n.yourdomain.in | Hostname n8n runs on |
N8N_PROTOCOL |
https | Protocol used in URLs n8n generates |
N8N_WEBHOOK_URL |
https://n8n.yourdomain.in/ (opens in new tab) | Public base URL for webhooks behind a proxy (WEBHOOK_URL before 2.30.0) |
N8N_PROXY_HOPS |
1 | Number of reverse proxies in front of n8n |
GENERIC_TIMEZONE / TZ |
Asia/Kolkata | Timezone for schedules and logs |
N8N_ENCRYPTION_KEY |
long random string | Encrypts saved credentials; auto-generated if not set |
N8N_RESTRICT_FILE_ACCESS_TO |
/files | Limits which folders file nodes can touch |
DB_TYPE |
postgresdb | Switch from SQLite to PostgreSQL for heavier use |
Critical: if you lose the encryption key, saved credentials (API keys, OAuth tokens) cannot be decrypted. It lives inside the n8n_data volume by default, which is why the backup section below copies the whole volume. For details, see n8n's environment variable reference in its docs.
How to update n8n safely
n8n releases new versions frequently. Update every few weeks, and always back up first.
cd ~/n8n-compose
sudo docker compose pull
sudo docker compose down
sudo docker compose up -d
These go to your project folder, download the newest images, stop and remove the old containers, and start new ones. Your workflows stay safe because they live in the n8n_data volume, not the container.
Tips:
- Read the n8n release notes before major version jumps.
- To stay on a specific version, change
image: n8nio/n8nto a version tag such asimage: n8nio/n8n:2.43.8, then pull and restart. - Remove old images to free disk space with
sudo docker image prune.
How to back up n8n
Use two layers: exported workflow files you can read, and a full copy of the data volume.
1. Export workflows and credentials with the n8n CLI
sudo docker compose exec n8n n8n export:workflow --backup --output=/files/backups/workflows/
sudo docker compose exec n8n n8n export:credentials --backup --output=/files/backups/credentials/
These run n8n's built-in export commands inside the container and save one JSON file per workflow and credential into ~/n8n-compose/local-files/backups/ on the server. Credentials stay encrypted, so you also need the encryption key to restore them.
2. Back up the whole n8n_data volume
sudo docker volume ls
sudo docker run --rm -v n8n-compose_n8n_data:/data -v "$PWD":/backup alpine tar czf /backup/n8n_data-$(date +%F).tar.gz -C /data .
The first command lists volumes; Compose prefixes them with the folder name, so it is usually n8n-compose_n8n_data. The second starts a temporary Alpine container that compresses the volume (database plus encryption key) into a dated .tar.gz file in your current folder. Stopping n8n first with sudo docker compose stop n8n gives the most consistent copy; start it again with sudo docker compose start n8n.
3. Copy backups off the server
From your own computer (Windows PowerShell, Mac Terminal or Termux):
scp [email protected]:~/n8n-compose/n8n_data-*.tar.gz .
This downloads the backup archives to your current local folder. A backup that lives only on the same VPS does not protect you if the VPS is lost.
Automate it: add the export and volume commands to a small script and schedule it with sudo crontab -e, for example daily at 2 am. Many VPS providers also offer paid snapshot backups, which are worth enabling.
Security checklist
- Use SSH keys and disable password login for SSH. Our guide on how to secure a Linux VPS covers this, plus Fail2ban.
- Create the n8n owner account immediately after first launch, with a strong unique password, and turn on two-factor authentication in your n8n user settings.
- Never publish port 5678 publicly. Keep it bound to
127.0.0.1. - Protect webhooks. Production webhook URLs are public by design; use header auth or a secret in the path for sensitive workflows.
- Restrict file access with
N8N_RESTRICT_FILE_ACCESS_TO, as in the official config. - Keep Ubuntu and n8n updated, and enable unattended security upgrades.
- Store API keys only in n8n credentials, never hard-coded in Code nodes or shared screenshots.
Troubleshooting common errors
| Problem | Likely cause | Fix |
|---|---|---|
| Browser shows certificate warning or "not secure" | DNS not pointing to VPS yet, or ports 80/443 blocked | Check A record, open ports in cloud firewall, then sudo docker compose restart traefik |
| Site does not load at all | Cloud firewall (Oracle security list, AWS security group) blocks 80/443 | Add ingress rules for TCP 80 and 443 |
Webhook URLs show localhost:5678 |
Webhook URL variable missing | Set N8N_WEBHOOK_URL (or WEBHOOK_URL on versions before 2.30.0) |
| "Connection lost" in the editor | Proxy not passing WebSockets | Use the official Traefik setup or Caddy; add WebSocket headers in nginx |
| Container keeps restarting, "out of memory" | Too little RAM | Add swap or move to a 2 to 4 GB RAM plan |
Permission denied on /files |
Folder ownership | Create local-files yourself before first start (Step 8) |
| Schedules run at the wrong time | Timezone not set | Set GENERIC_TIMEZONE=Asia/Kolkata and TZ |
To add 2 GB of swap on a small VPS:
sudo fallocate -l 2G /swapfile
sudo chmod 600 /swapfile
sudo mkswap /swapfile
sudo swapon /swapfile
echo '/swapfile none swap sw 0 0' | sudo tee -a /etc/fstab
These create a 2 GB swap file, secure it, enable it and make it permanent across reboots. Check with free -h.
What keeps a self-hosted n8n server healthy
- Use n8n's own Docker Compose file: Traefik gets the HTTPS certificate for you.
- Create the A record and open ports 80 and 443 before the first
docker compose up -d, or the certificate request fails. - Keep port 5678 bound to
127.0.0.1, because Docker-published ports bypass UFW. - Back up first, then update with
docker compose pull,downandup -d. - Copy both the exported workflows and the
n8n_datavolume off the server; the volume holds the encryption key. - Size for 4 GB RAM if you run AI agents or large files; 2 GB plus swap is enough for learning.
Install n8n on VPS today, then automate your backups
Installing n8n on a VPS takes four pieces: Ubuntu 24.04, Docker with the Compose plugin, a subdomain pointing to your server, and the official compose file that pairs n8n with Traefik for automatic HTTPS. After that, the real work is routine: update every few weeks, back up the data volume and exported workflows off the server, and keep the server secured. If you have not picked a server yet, compare options in our best VPS hosting in India guide, and explore more developer guides in our AI Coding section.
FAQ
Frequently Asked Questions
Is self-hosted n8n free?
Yes, the self-hosted Community Edition of n8n is free to use under its fair-code Sustainable Use License, which allows free use for your own or your company's internal purposes. You still pay for the server, usually a VPS costing a few hundred rupees a month. Some advanced features, like SSO, need a paid Business or Enterprise licence.
What are the minimum requirements to self-host n8n?
n8n is light on CPU. Its documentation gives illustrative sizing of 320 MB to 2 GB of RAM and 512 MB to 4 GB of database storage. In practice, a VPS with 1 vCPU and 2 GB RAM plus swap works for learning, while 4 GB RAM is comfortable for most small business automations, especially those using AI or large files.
Can I install n8n on Hostinger VPS?
Yes. Hostinger's KVM VPS plans run Ubuntu and support Docker, so the same Docker Compose steps in this guide work. Hostinger also offers a ready-made n8n VPS template that installs n8n for you. Using the manual method gives you more control over versions, environment variables and backups, and works on any provider.
Should I use n8n Cloud or self-host n8n?
Choose n8n Cloud if you want zero maintenance and run a modest number of executions; plans start at €20 per month billed annually. Self-host on a VPS if you are comfortable with Linux, need many executions, want data in India or want lower long-term costs. Self-hosting makes you responsible for updates, security and backups.
Do I need a domain to install n8n on a VPS?
A domain is strongly recommended. Without one, you would access n8n over plain HTTP on the server's IP, which is insecure, and many services like Google OAuth and webhooks require HTTPS. A subdomain such as n8n.yourdomain.in with a free Let's Encrypt certificate is the standard setup, and the official n8n Docker Compose file expects one.
How do I update n8n installed with Docker Compose?
Go to the folder with your compose.yaml file, back up first, then run docker compose pull to download the latest image, docker compose down to stop the old containers, and docker compose up -d to start the new version. Your workflows and credentials stay in the n8n_data volume, so they survive the update.
Where does n8n store data in Docker?
In the official Docker Compose setup, n8n stores its SQLite database, settings and encryption key in a Docker volume called n8n_data, mounted at /home/node/.n8n inside the container. Files shared with workflows live in the local-files folder on the server, mounted at /files. Back up both regularly, and copy backups off the server.
Can I run n8n with PostgreSQL instead of SQLite?
Yes. Set DB_TYPE to postgresdb and add the DB_POSTGRESDB host, port, database, user, password and schema variables, then run a PostgreSQL container or managed database. PostgreSQL is better for heavy use, many executions or queue mode. For a personal or small business setup, the default SQLite database is usually enough.
Why are my n8n webhook URLs showing localhost?
This happens when n8n runs behind a reverse proxy but does not know its public address. Set N8N_WEBHOOK_URL to your public HTTPS address, such as https://n8n.yourdomain.in/ (opens in new tab), and restart the container. On n8n versions before 2.30.0, the variable is called WEBHOOK_URL. With a proxy like Caddy, also set N8N_PROXY_HOPS to 1.
Can I install n8n on the Oracle Cloud free tier?
Yes, n8n runs well on Oracle Cloud's free Arm instances, since the official n8n Docker image supports Arm64. Use Ubuntu 24.04, follow the same Docker Compose steps, and remember to open ports 80 and 443 in both the Oracle security list and the server firewall. Free capacity is not always available in every region.
Where to buy
-
Visit official site (opens in new tab)
n8n Cloud
-
Visit official site (opens in new tab)
Hostinger
-
Visit official site (opens in new tab)
Contabo